
Remove Object from Image Online
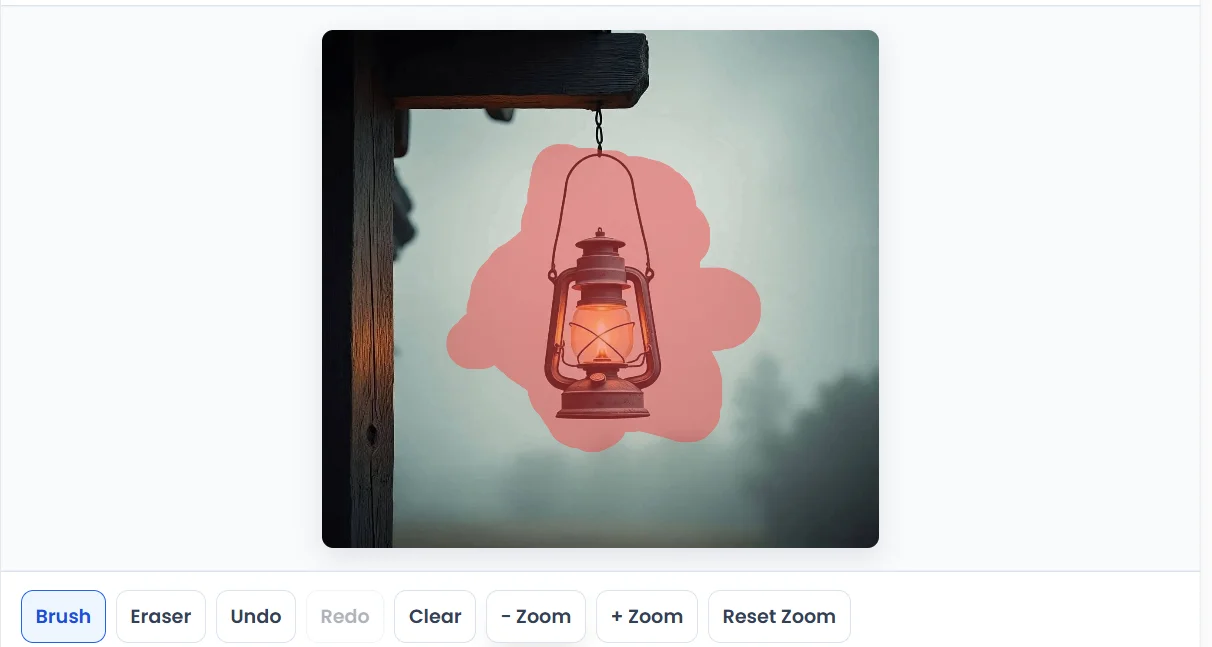
Brush over an unwanted person, object, sign, or distraction. AI removes the selected area and rebuilds the background around it.
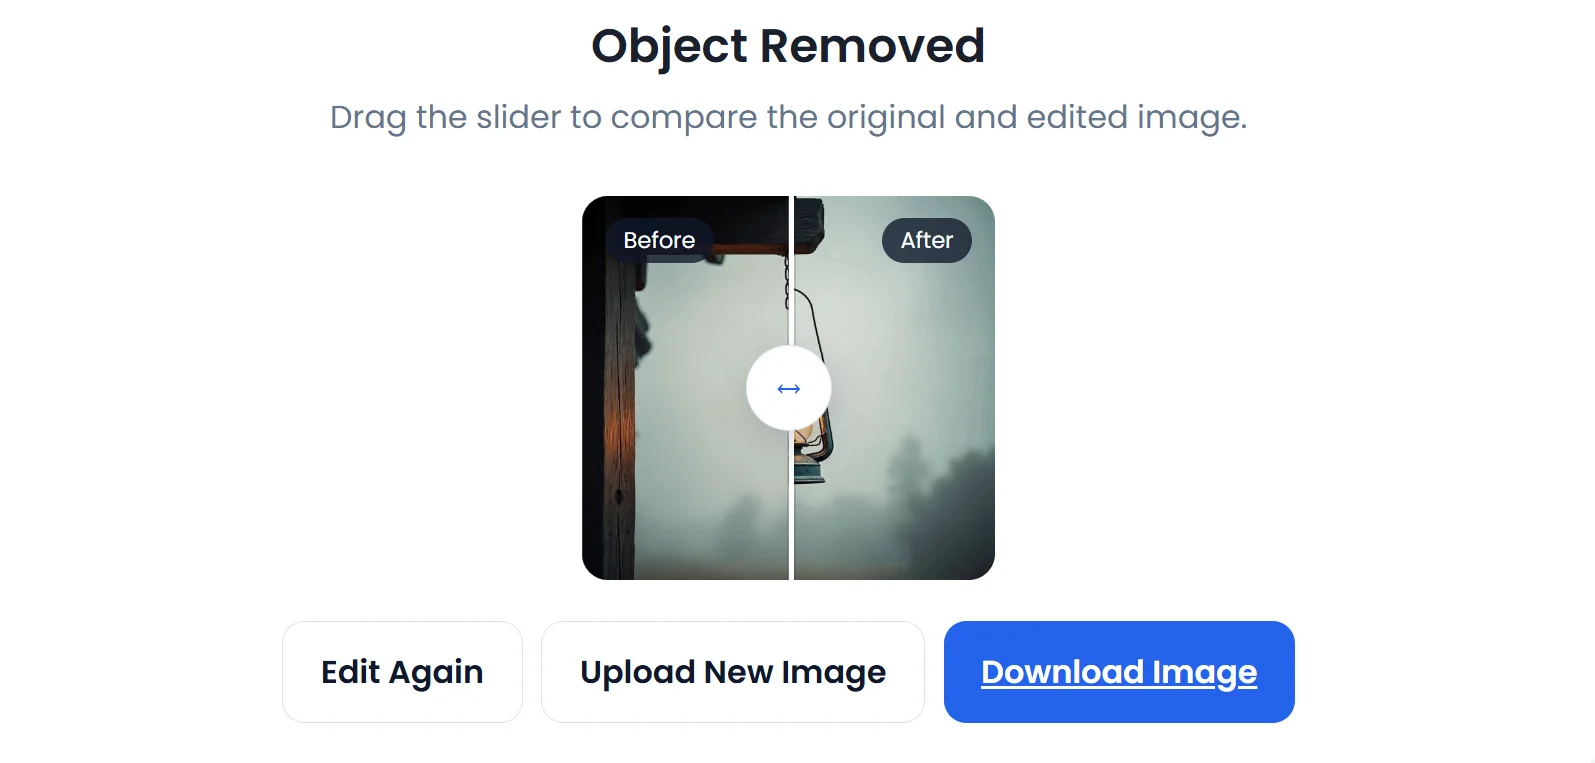
Object Removed
Drag the slider to compare the original and edited image.
Remove Object from Image Without Rebuilding the Whole Photo
An unwanted person, sign, cable, bin, product prop, or background distraction can pull attention away from an otherwise useful photo. PixConvio lets you remove object from image by marking only the area that should disappear. The edited region is rebuilt while the rest of the picture stays outside your selection.
The workflow is intentionally simple. Upload a photo, brush over the unwanted area, run the removal, and compare the result with the original before downloading. You can adjust the brush size, erase part of your selection, undo a stroke, or zoom when an object sits close to an important edge.
How to Remove an Object from a Photo Online
You do not need to manually clone pixels or build layers for a basic cleanup. The AI object remover uses the area you mark as the editing target, then generates a replacement that fits the surrounding scene. OpenAI describes its current image models as supporting image editing, and its image editor also uses a selection workflow for targeted changes.
Upload your image
Choose a JPG, PNG, or WebP image. A clear source gives you more detail to inspect around the object and its edges.
Brush over the unwanted object
Cover the complete item you want to erase. Change the brush size when you need more control around hair, clothing, products, signs, or narrow objects.
Click Remove Object
The selected region is sent for AI editing. The goal is to remove the marked subject and rebuild that area from the visual context around it.
Compare and download
Drag the Before and After slider across the result. Check the edited area closely, then download the version you want to keep.
What Can You Remove from an Image?
An object remover from photo is useful when one visible element is spoiling an otherwise good image. It is best treated as a targeted cleanup tool rather than a full photo editor.
People and photobombers
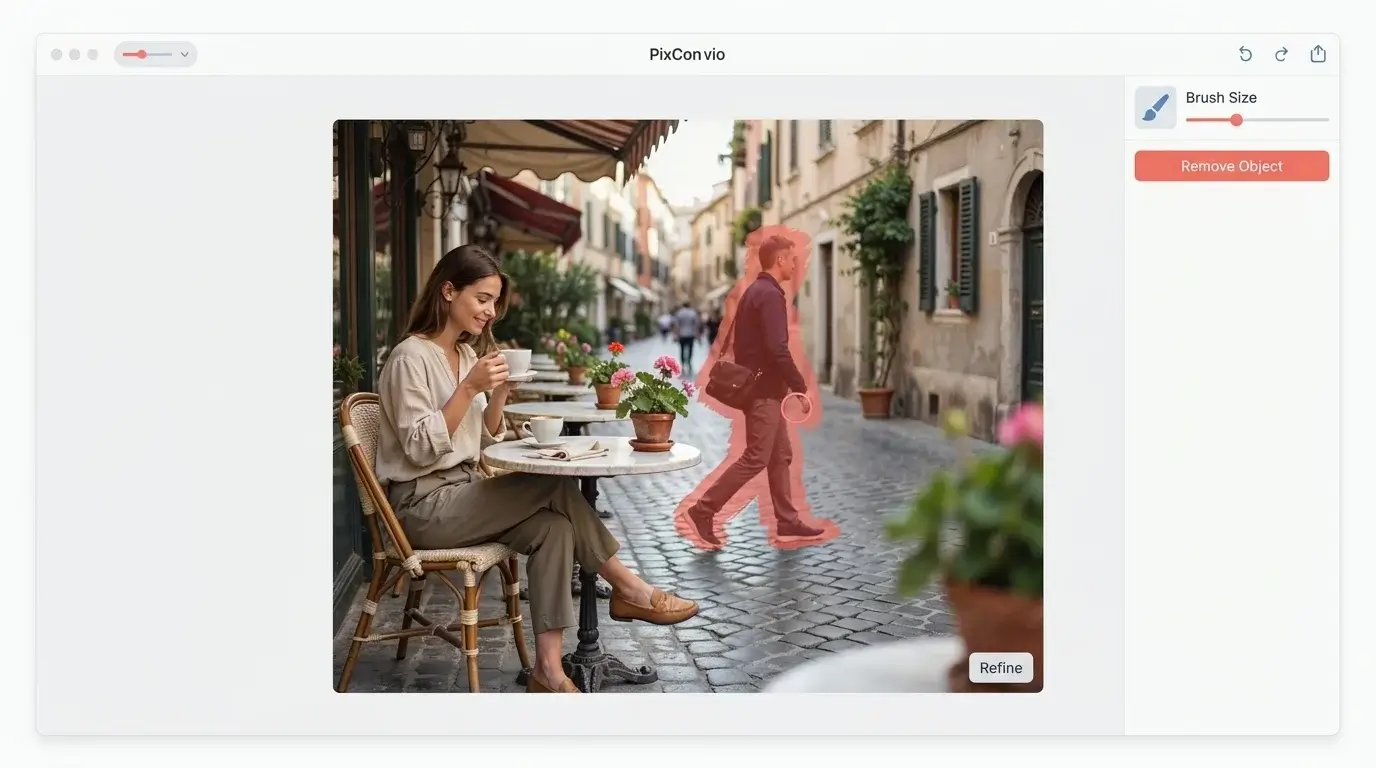
Remove a passerby, tourist, or unwanted background person. For larger people, cover the full body and any shadow that should disappear.
Signs, cables, and clutter
Erase a sign, power line, bin, chair, bag, pole, or other visual distraction that pulls attention from the main subject.
Product photo distractions
Clean up props, stray packaging, dust, price tags, cables, or objects around a product while keeping important product edges outside the selection.
Small marks and overlays
Remove a small date stamp, caption, mark, or overlay when you own the image or have permission to edit it. Review any detailed background behind the removed area.
Remove Person from Photo Without Cutting Out the Background
Sometimes the problem is not the whole background. It is one person standing behind the subject, a tourist in a travel photo, or someone entering the frame at the wrong moment. In that case, a remove person from photo workflow is more suitable than removing the complete background.
Brush over the complete person and keep the selection reasonably close to their outline. If the person overlaps brickwork, railings, water, foliage, text, faces, or another detailed subject, inspect the result carefully. AI editing can rebuild missing areas, but the system does not have a hidden copy of what was actually behind the removed person.
Tips for Better AI Object Removal
Good selection matters. Current AI image editors can make targeted changes, but OpenAI also notes that selections are not always perfectly precise and edits may extend beyond the highlighted area. That is why a quick review after each removal is important.
- Select the complete object. Leaving a small edge, handle, foot, wire, or shadow outside the selection can leave a visible fragment.
- Use a smaller brush near important edges. This is especially helpful near faces, hands, product outlines, text, and straight architectural lines.
- Remove difficult objects in separate passes. Several smaller edits are often easier to inspect than one very large painted area.
- Check repeating patterns. Brick, tiles, fences, foliage, fabric patterns, and similar textures can reveal repeated or bent details after a fill.
- Keep your original file. Save the untouched image so you can retry with a tighter selection if the first edit does not look natural.
Remove Object from Image vs Background Remover
These two tools solve different problems. Use the remove object from image tool when you want to erase one selected distraction while keeping the rest of the scene. Use a background remover when the goal is to separate the main subject from the entire background.
| Task | Object Remover | Background Remover |
|---|---|---|
| Remove one unwanted item | Best choice | Not the main purpose |
| Remove a person in the background | Yes | Usually unnecessary |
| Rebuild the selected area | Yes, using AI editing | No, it normally separates the foreground subject |
| Make the full background transparent | No | Yes |
| Keep most of the original scene | Yes | The background is intentionally removed |
Need the whole backdrop removed instead? Use the PixConvio Background Remover.
Where an AI Photo Eraser Works Best
An AI eraser works best when the surrounding scene gives the model useful visual context for rebuilding the selected area. A small object against sky, wall, grass, road, or another consistent surface is generally easier to repair than a large subject covering detailed text, another face, or complicated geometry.
That does not mean complex edits cannot work. It means they deserve a closer preview. If the filled area looks blurred, repeated, bent, or visually inconsistent, undo the edit, tighten the selection, and try another pass.
Travel photos
Clean up tourists, bins, signs, vehicles, or small distractions while keeping the location and main subject in the frame.
Product images
Remove props, cables, labels, packaging, and stray objects around a product before using the image in a listing or graphic.
Social photos
Erase a photobomber, stray object, background mark, or other distraction before cropping and posting the image.
Real estate photos
Remove a small bin, sign, cable, or isolated piece of clutter. Large furniture removal may require more careful inspection because it covers more of the original scene.
Frequently Asked Questions
How do I remove an object from an image online?
Upload your image, brush over the complete unwanted object, click Remove Object, and review the edited area with the Before and After slider. Download the result only after checking the repaired background.
Can I remove a person from a photo?
Yes. Mark the complete person you want removed, including any connected shadow that should disappear. Check nearby faces, hands, clothing, architecture, foliage, and repeating patterns after the edit.
How does an AI object remover work?
You identify the area to edit, and the AI generates replacement image content for that selected region using the rest of the image as visual context. The generated fill should still be reviewed because the model does not know exactly what was hidden behind the removed object.
Can I remove several objects from one photo?
Yes. For difficult scenes, removing objects one at a time can make each result easier to inspect and refine.
Why can the removed area sometimes look unnatural?
Complex textures, text, faces, straight lines, reflections, and large hidden areas can be harder to reconstruct. Try a tighter selection, include any remaining fragment or shadow, and run another pass.
What is the difference between an object remover and a background remover?
An object remover edits a selected part of the image and rebuilds that region. A background remover separates the main subject from the complete background, often to create a transparent or replaceable backdrop.
Can I remove text, logos, or watermarks?
The selection tool can target visible image areas, but only remove text, logos, or watermarks when you own the image or have permission to make that edit. Detailed content behind an overlay may also need a careful visual check after removal.
More PixConvio Image Tools
Use the related tool that matches the change you actually need instead of forcing one editor to do every job.